Showing posts with label Recipes. Show all posts

Tuesday, August 18, 2015

2 on Tuesday

photo from Disney Parks Blog
Did you follow anything coming out of the D23 expo this past weekend?  I didn't follow too intensely, but definitely caught the highlights.  The most exciting news to me?  A Star Wars and a Toy Story land are coming to Hollywood Studios!  I am sure it will be years before they are open, but that park is in desperate need of new energy.  I know Disney will do it right, so this makes me soooo excited!


This was the first weekend in a while I was home and I was so excited to be able to do some cooking again.  I am really working on eating clean and healthy this marathon training cycle, so I tried a new recipe from Clean Eating magazine.  It was Beef Quinoa Mini Meatballs with Pomegranate Sauce & Mashed Cauliflower.  It was really good!  I had never made mashed cauliflower before, but it was so easy and yummy.  I wouldn't say it tastes exactly the same as mashed potatoes (mmmm heavy cream and butter), but it's a healthier option (and it's still very yummy).  Any healthy recipes you want to recommend for me?

Tuesday, December 23, 2014

2 on Tuesday

via QVC
I love hard boiled eggs.  They are a great source of protein and are a quick breakfast in the AM when I am (almost always) rushing to get to work on time.  However, I'm not very good at making them.  They seem simple enough and they always come out fine, but it's one of those things that I know could be made better.  I finally caved and bought an egg cooker.  It is soooo easy.  I swear I have no idea why I waited so long.  It does all the work and they come out perfect every time.  I think I've hit the height of laziness with this one.


I've been trying to cook more lately.  Not because it's economical or good for me (although those points are both true), but because I need to justify how much time I spend on Pinterest.  I have so many recipes pinned that I really need to start making them!  I made this Sriracha Noodle Soup last week and OMG - so delicious.  Took a little longer then the title indicated (20 minutes) but so worth it!  Made about 4 large servings and was just as good heated up later in the week.  Perfect for the cold and rainy days we've been having!  And yes, I made the poached egg using my egg cooker.

Tuesday, June 17, 2014

2 on Tuesday


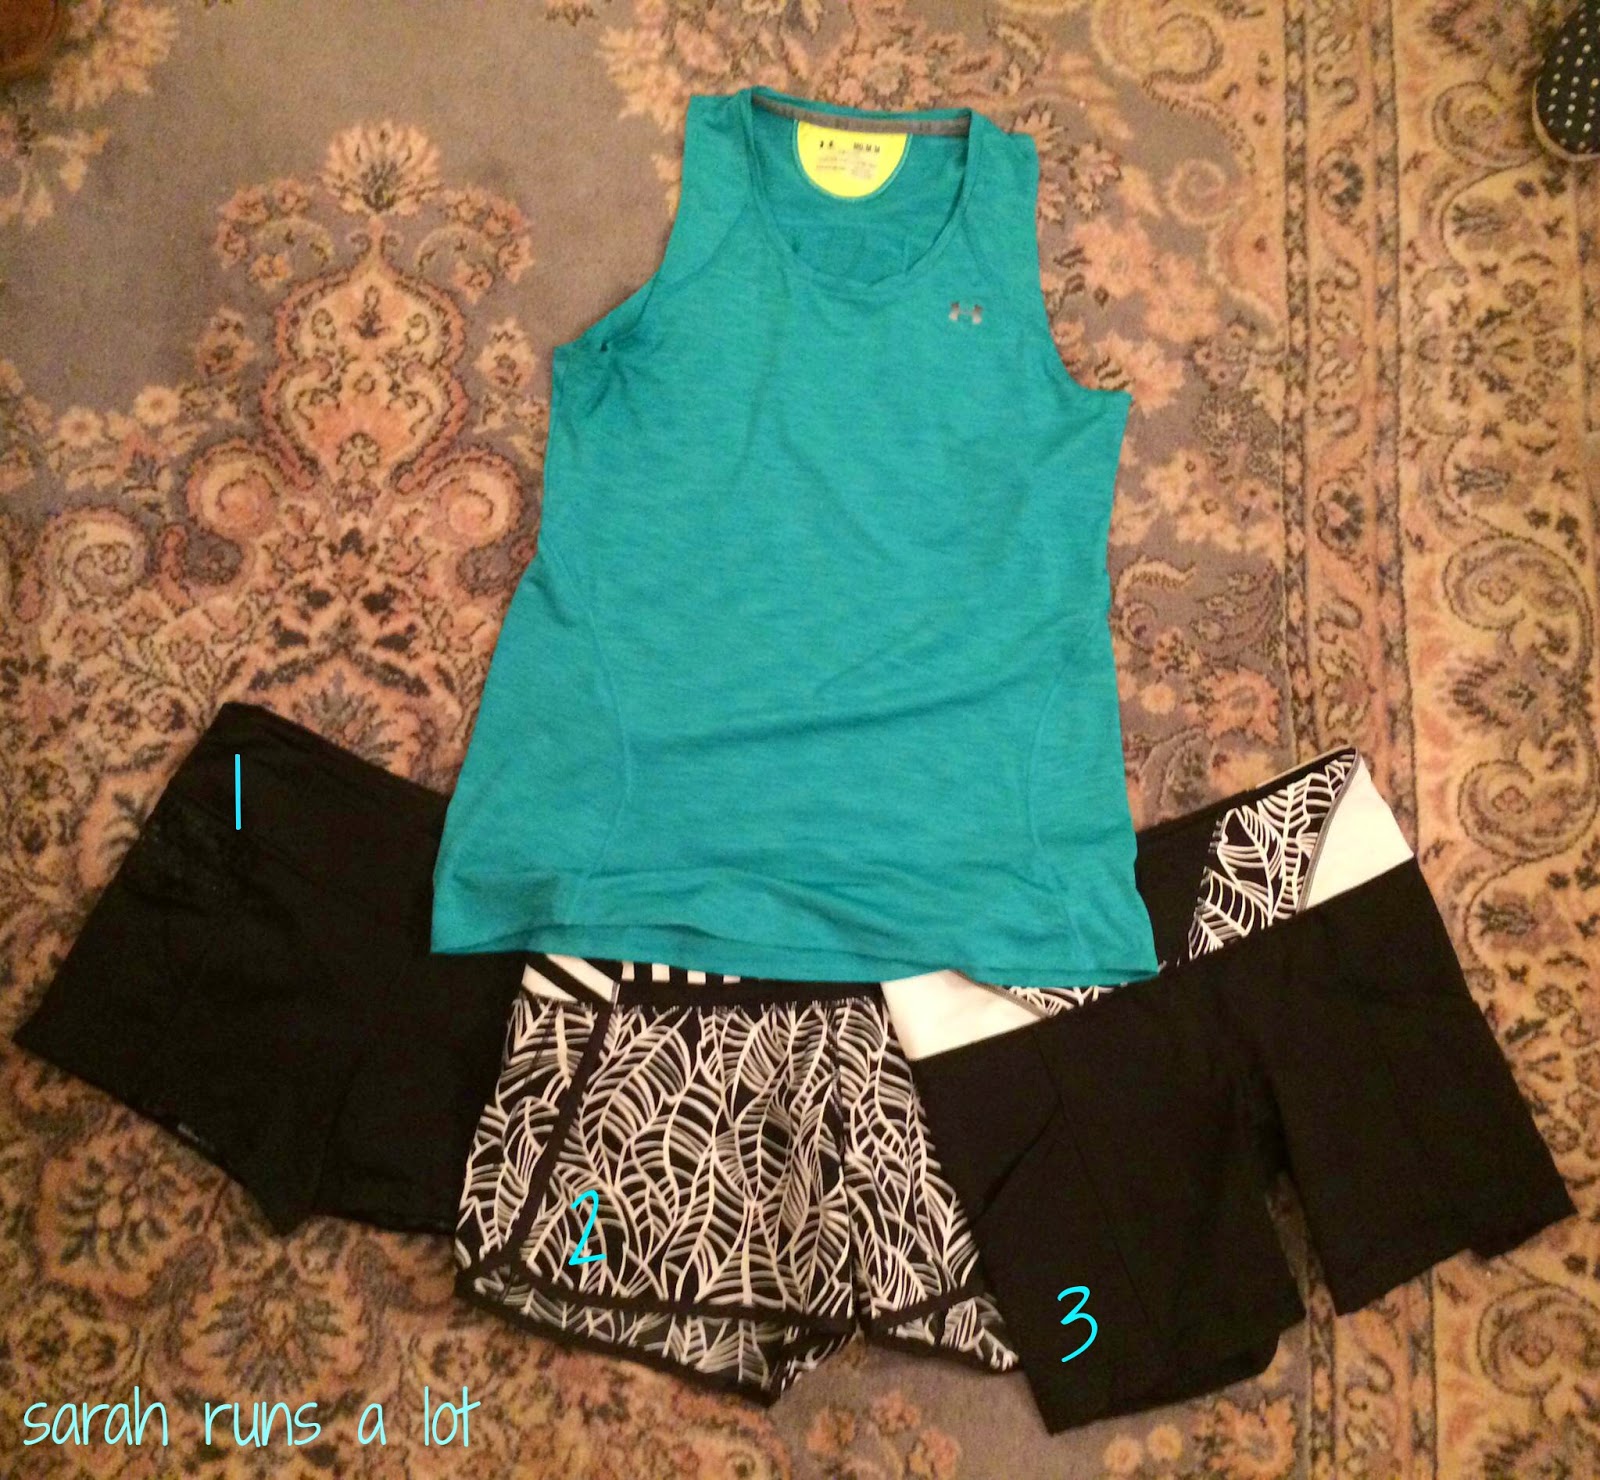
I am starting to pack for the race this weekend and can't decide what to wear.  Help!  I know the top - it's the same style I wore for the Disney marathon and I wore it during Nike DC so I know it's comfortable and has some good vibes attached to it.  I just can't decide what shorts to wear.  Which one do you like?  Let me know in the comments!


I've been trying to cook more lately and my friend Joanne posted this delicious recipe on her blog - sweet potato gnocchi with balsamic-roasted asparagus and caramelized onions.  It came together pretty easily and was really yummy.  I used regular gnocchi as I couldn't find sweet potato at the store I was at.  It was still good, but I would like to make it with the sweet potato gnocchi as well as I think it would be even better. 

Wednesday, June 11, 2014

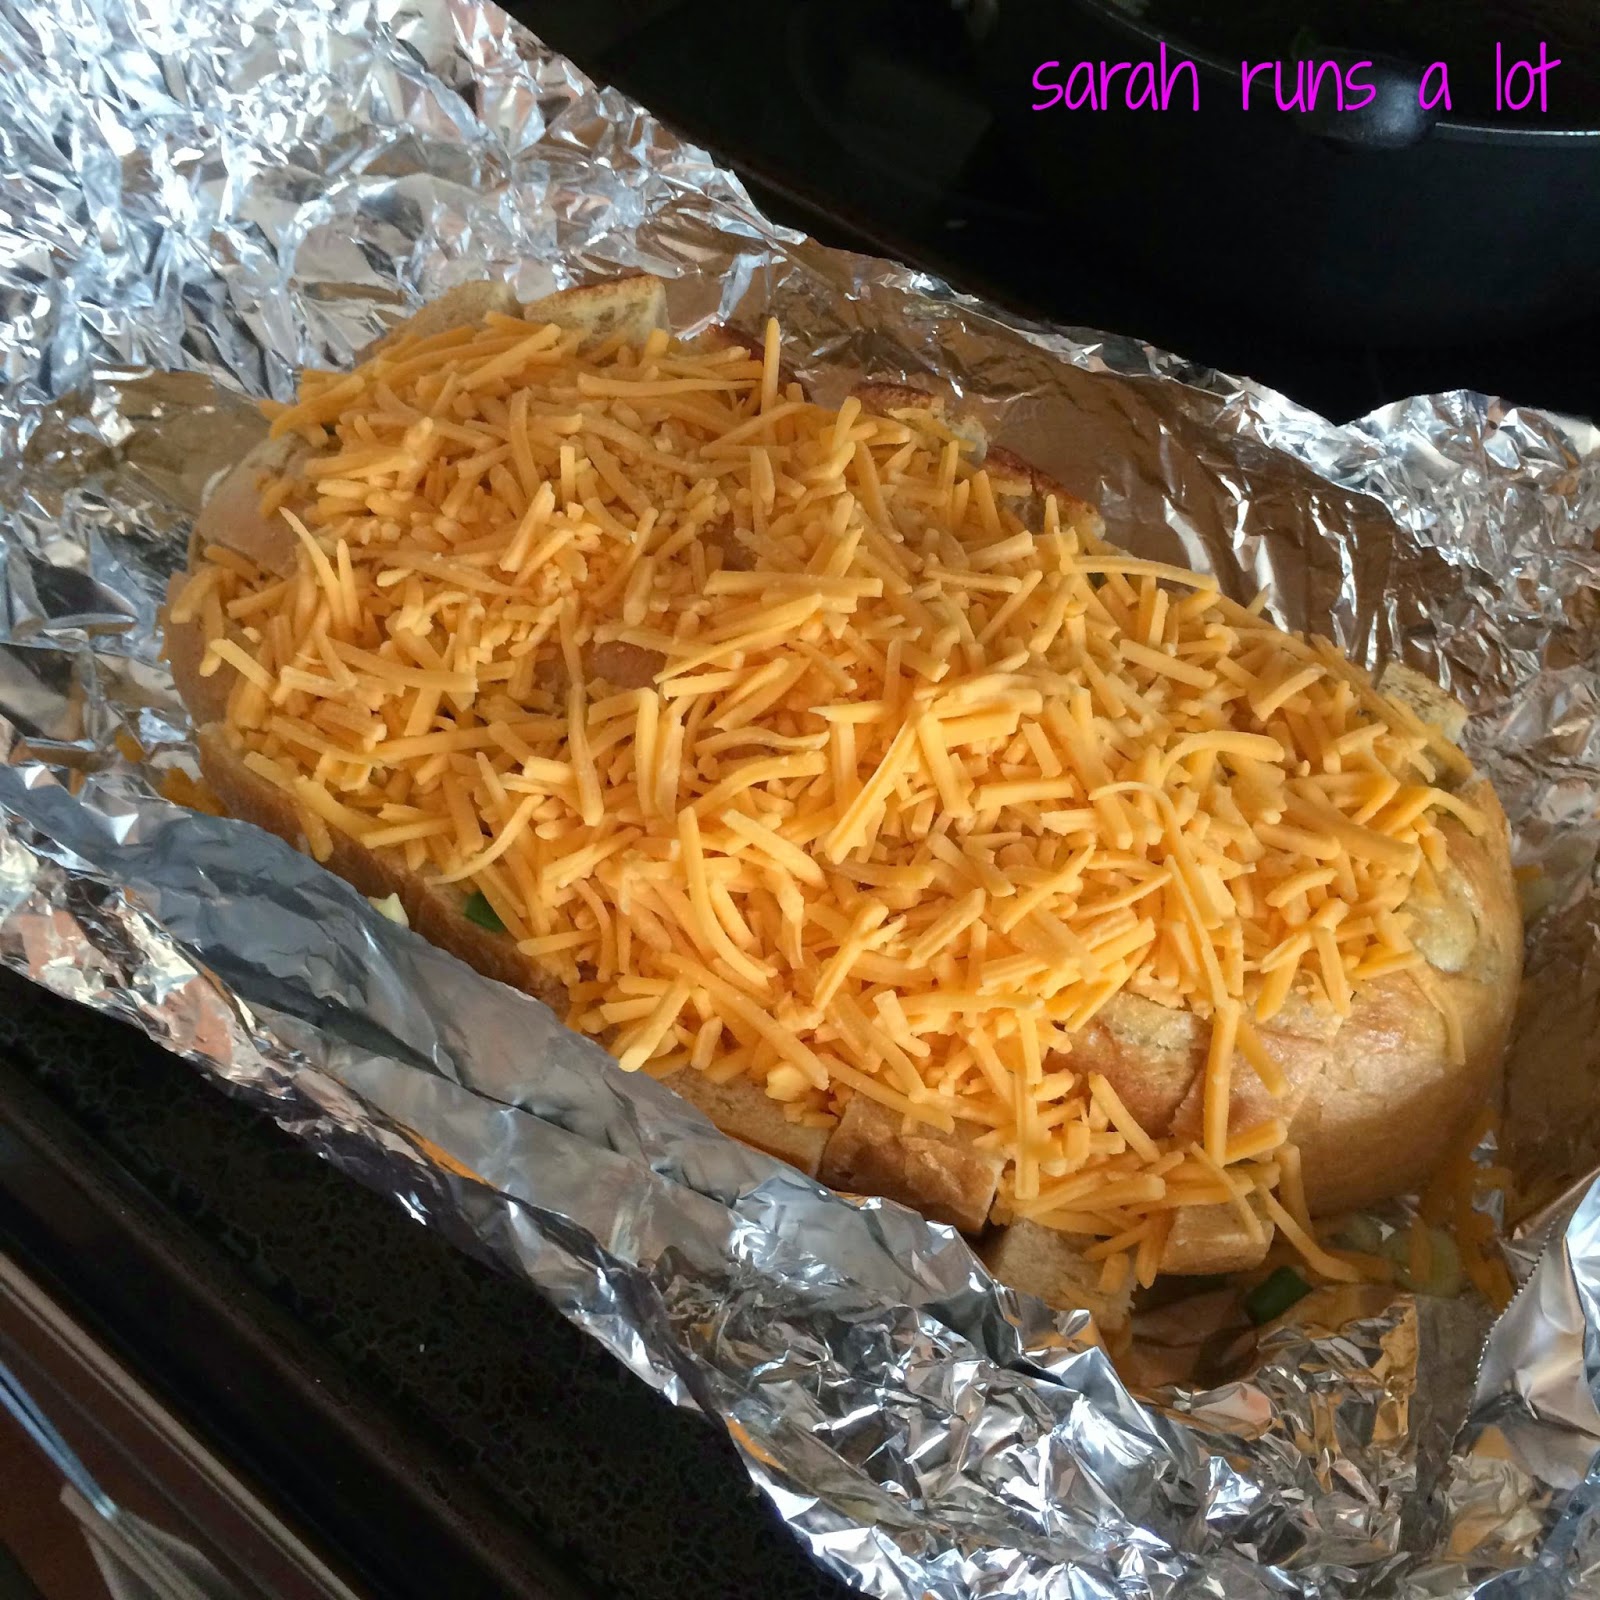
Cheddar Tailgating Bread {Pinterest Success}

Now that I am finally caught up on my race recaps, I want to share some of the other stuff I'm been doing this spring (and now summer).

I went home at the end of March for my nieces birthday.  She's only 2, so we do a small family thing and I offered to bring an app with me.  Of course, I turned to Pinterest for my dish.  I decided to bring an appetizer and after some deliberating, I decided on Cheddar Tailgating Bread.

I saw a couple of versions (by various blogs) on Pinterest but I decided to go with this one on Tasty Kitchen by Foodie with Family.  It looked relatively easy and that I'd be able to make it on site.

It was pretty easy to put together, which is no easy feat considering there were 4 small children running around and a house full of adults distracting me.


Overly simplified directions by me -

1. Melt butter and mix with garlic and sliced green onions
2. Cut loaf of Italian bread into squares/grid, but don't cut all the way to the bottom.  Separate pieces to make space
3. Pour butter/garlic/green onion mixture into the crevices created by the squares


4. Wrap bread in foil and bake for 10 minutes
5.  Remove from oven and sprinkle with cheddar cheese, making sure to push the cheese into the crevices


6.  Return to oven uncovered and cook for another 15 minutes until cheese is melted
7.  Let sit for 3 minutes to cool and sprinkle parsley over top

Next time, I will probably saute the garlic and green onions for a bit to soften them before adding to the bread.  I'll also decrease the amount of cheese because it was overflowing and we didn't even use all the cheese it called for.  I'd also cut back on the amount of parsley because it seemed like a lot to me (but you might like that much!).

Overall this recipe was easy and delicious!  I would call this one a Pinterest Success!

You can get the full recipe here!


Saturday, June 7, 2014

Pineapple Coconut Popsicles


Since it's summer now, I thought I'd break out my popsicle molds.  I found this recipe on pinterest, but it didn't link to anything (I hate when that happens).  It listed ingredients in the subject, but wasn't fully specific (just items, not amounts).  After doing some pinterest searching, I made an educated guess as to what amounts to use.

Only 4 ingredients and they are so much better for you than popsicles you buy at the store.

Pineapple Coconut Popsicles
Source: Pinterest (if you know who's recipe this actually is, let me know and I'll give credit!)
Yields: 10-12 pops depending on the size of your molds

(1) 20 oz can of pineapple chunks
(1) 14 oz can of coconut milk (I used regular, but you could probably use lite if it's a big deal)
(1) Banana
1/2 tsp vanilla extract

Directions:
1. Combine all ingredients in blender
2. Blend until smooth
3. Fill molds, but not completely
4. Freeze for at least 8 hours

So yummy and delicious!

Tuesday, December 17, 2013

2 on Tuesday

It's snowing.  Again.  If you are counting this makes for 3 snowfalls in a 1 week period.  This does not bode well for this winter.  I feel like I am in Syracuse again.  Except I can't wear sweatpants to work everyday like I could with classes.  I'm going to have to do tonights workout on the treadmill because it is really gross out and the temp is dropping.  I'm afraid it is going to be super icy in the park and it's not worth the risk so close to Dopey.  Anyway...


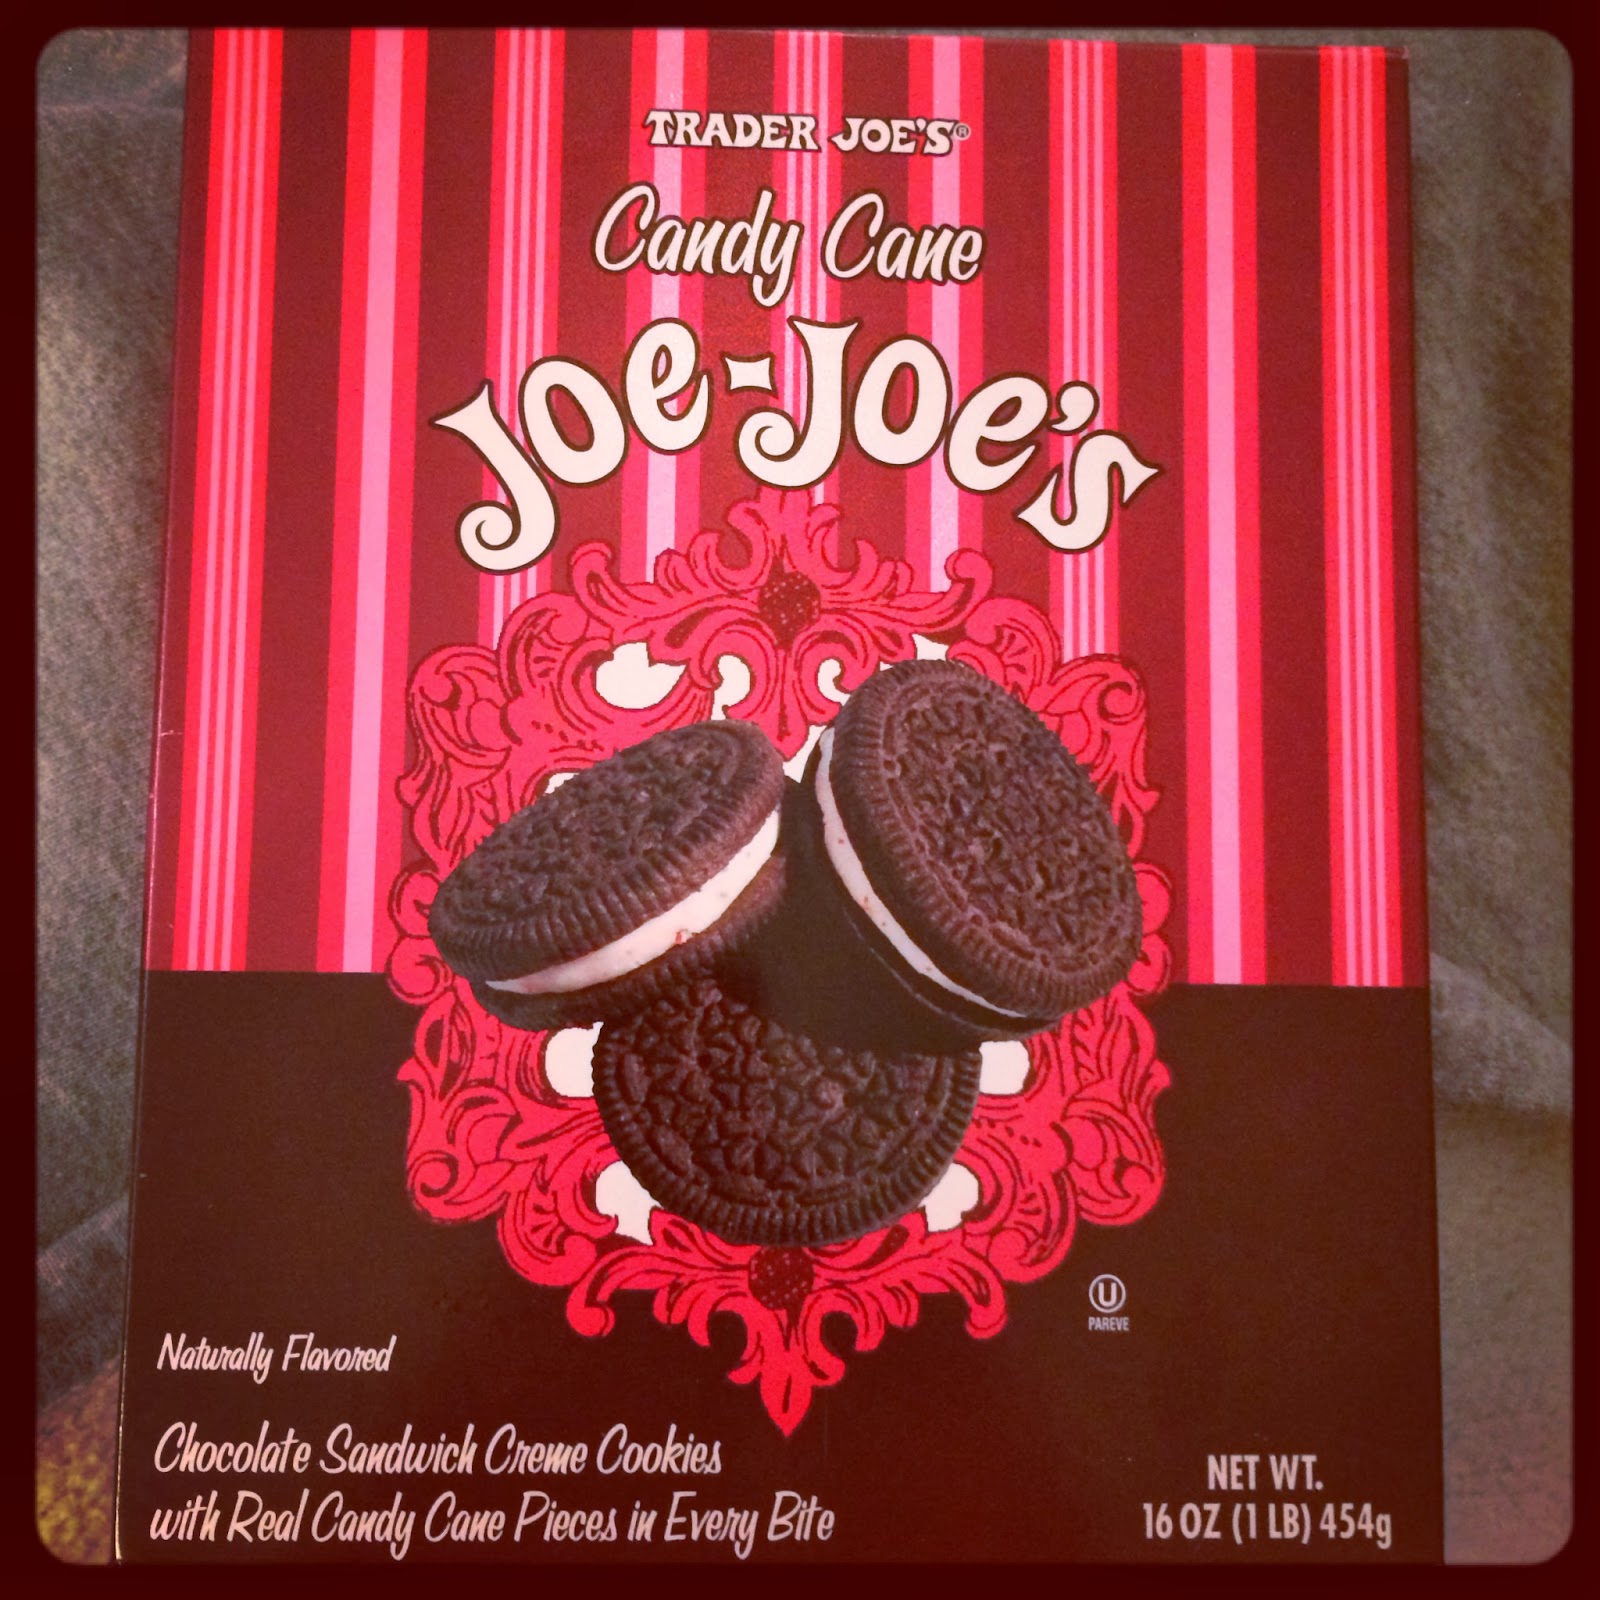
These are my absolute favorite item from Trader Joe's.  Oreo's with crushed peppermint in the filling?  How could they be bad?  I seriously wish they sold them all year long.  I may or may start hoarding them once they appear in store.  They are best cold, so put them in the fridge!  They also make for a delicious milkshake with some almond milk and vanilla ice cream.  Hmmm, now I want a milkshake.


I have a seriously love of brussel sprouts and butternut squash so this recipe was right up my alley.  Quinoa, roasted brussel sprouts and caramelized butternut squash.  So simple, yet so delicious!  I left out the pepitas and it was still excellent (only because my grocery store didn't have them).  I even made it for my works Thanksgiving potluck and it was a big hit.  I also discovered while making this recipe how to make my own brown sugar (I was out and too lazy to go to the store).  Just mix regular sugar and molasses (yes, I had molasses on hand).  I think I will be making this a lot!

Monday, November 11, 2013

S'mores Bites

I am still in Disney World eating and drinking my way around the Food and Wine Festival, I thought I would post a recent recipe I made that has been hanging out in my draft folder for a while.  Hope you are all having a nice Monday!

*************************

I made these treats a ridiculously long time ago when I was in the mood for something easy and sweet.  Fortunately, my sweet tooth coincided with a birthday at work, so I brought most of them into the office so I wouldn't be tempted to eat them all!

I found this recipe through Pinterest and since it involved minimal ingredients and no gadgets, it was right up my alley.  I love cooking but once crazy ingredients or gadgets get involved, it usually falls off the 'To Cook" list.  I like simplicity (and I'm lazy, let's be real).  It was also a no-bake dessert which meant I did not have to turn on my oven on a sweltering day.

This recipe was from the blog Gimme Some Oven and was so easy to make my niece could do it (in fact, this would probably be a great recipe to make with her.  She'd love it.).  I saved some for myself, but took the rest to work and I can confirm they were a big hit.  Completely gone by the end of the day!

Steps (as simplified by me):
1. Melt butter
2. Add marshmallows and stir until melted
3. Remove from heat and add in Golden Grahams (remember them?)
4. Add chocolate chips
5. Place on parchment paper to cool

So easy right?  The full recipe is available at Gimme Some Over or click here to go directly to the recipe.

Enjoy!


Thursday, September 5, 2013

One Pan Pasta

I am still getting settled after my trip and getting caught up at work, I thought I'd share a recipe that's been hanging out in my drafts for awhile. Enjoy - I'll be back with race recaps soon! 

*************************

This was a recipe I found via Pinterest.  I saw it a lot showing up on my pinterest feed.  Since I love pasta and use my running as an excuse to eat it, I thought I'd give it ago.  Plus, the recipe came from Martha Stewart, so I knew it was a trusted source.

It didn't involve any crazy ingredients and since it was billed a 'one pan pasta', obviously did not involve any gadgets.  I prepared all the ingredients per Martha and added it all to the pot.  The ingredients were simple: linguine, tomatoes, onion, garlic, red-pepper flakes, basil, olive oil, salt, pepper, water.

In the pot it goes!
Bring it to a boil and just let it boil (stirring frequently - this is important or it sticks to the bottom of the pan) until pasta is al dente or water is all dissolved.

Took me a little longer then Martha said it would, but it still came together nicely.  The onions and tomato's softened and made a nice sauce for the pasta.  It made a ton, so I had leftovers for lunch for a couple of days (which reheated nicely!).

I did really like this recipe and will definitely make it again.  I like that it only involved 1 pot making clean up minimal!  The only thing I would change would be to add more tomato's.  I love cherry tomato's and would have liked more in the dish.  I also think it would make it more sauce like.  So next time I make it, I will double the tomato's.

Finished product
Visit Martha Stewart for the recipe by clicking here.

Enjoy!

Tuesday, July 16, 2013

2 on Tuesday


I don't think it's a secret by now that I love beauty products.  I am such a product junkie.  When I was in SF visiting Vanessa, she had some Trader Joe's shampoo/conditioner in her shower.  Of course, I had to try it.  I wasn't expecting it to be anything great (I admit I can be a brand snob sometimes), but I have to admit, I really like it.  It makes my hair feel soft and doesn't weigh it down (I have really fine hair).  It does just as good as a job as any other shampoo and since they are only $2.99 a bottle, my wallet likes it too.


While I was in Marshall's a couple of weeks ago, I find these great popsicle molds.  This weekend, I decided to make my first batch.  Nothing too crazy, I just pureed some watermelon cubes with about 1 tablespoon of honey.  After filling the molds, I popped them into the freezer overnight to solidify.  They turned out quite delicious!  I think if I make watermelon ones again, I will add a pinch of sea salt to the mixture.  I know it's weird, but I always add salt to watermelon.  I don't know how to describe it, it just makes it taste better.

Does anyone else had salt to watermelon?  I also do it to cantaloupe and honeydew (basically any melon).  If not, you should try it sometime, it's Sarah approved.  

Friday, April 12, 2013

"In a Pinch" Pasta Sauce

You know what is the worst?  Coming home from work all ready to make dinner and realizing you are missing a key component.  It's the worst.

It happened to me tonight.  I got home from work and was planning on making pasta for dinner (you know, a little carbo loading before my long run).  But alas, no pasta sauce. 

Fortunately, I had some left over crushed tomatoes from a recipe I made this weekend (recipe called for 7.5 oz, but I could only find a 14oz jar at my grocery store) to work with.  Sauteed some onions and peppers, added the crushed tomatoes plus some spices and let it warm up.  I wasn't sure how it would come out, but it was delicious. 

I served it over some quinoa pasta (which is gluten free and my favorite kind of gluten free pasta.  For the record, I do not like rice pasta).  I think it might even become my new go to pasta sauce.  Super easy and quick to make!

"In a Pinch" Pasta Sauce

Olive Oil
Onions, chopped
Red pepper, chopped
Crushed tomatoes
Italian Seasoning
Salt
Pepper

1.  Saute onions and peppers in olive oil to desired tenderness (I like my peppers to still have a little bite)
2. Add in crushed tomatoes
3. Season with italian seasoning, salt and pepper to taste.
4. Heat until warm throughout

The amount of onion, pepper and crushed tomato will depend on serving size.  Since it was just me, I used a palmful of both onions and peppers and 3 large spoonfuls of crushed tomatoes.  Spices are to taste (I need extra salt before long runs, so I put in more salt then most people probably would).

Enjoy!

pardon the bad photo!

Wednesday, March 20, 2013

Thin Mint Milkshake

I did not have time to go to the grocery store Sunday night after coming home from the race, but I was dying to use my Magic Bullet for the first time.  So I basically opened my fridge/freezer to see what I had that I could use to make something.

And guess what I found in the back of my freezer?  A box of Thin Mints.  Heaven on earth.  Sold!

This milkshake (is not healthy or gluten free) but is delicious.  I took 6 frozen thin mints, a cup or almond/coconut milk and a handful of ice cups.

Ingredients - check!
Threw all the ingredients in the magic bullet and used the pulse method to blend the ice and mints together.  Took a total of maybe 2 minutes.  Seriously.  So easy.

So easy and delicious!

Thin Mint Milkshake
6 Frozen Thin Mints
1 cup of milk of your choice
Handful of ice (use amount that provides the texture you like in your milkshake)

1. Place all ingredients in blender.
2. Blend.
3. Enjoy!

Thin Mint Milkshake (tastes better then it looks)

Saturday, October 20, 2012

Pumpkin Dip

So I had a post all written for this...and then somehow the whole thing got deleted!  Ugh.  Sometimes I think the machines are out to get us.  Won't be long before they take over the world.  (ok, technology rant over).

Anyways...back to the original purpose for this post.  Today, I'm joining a link up about 'All Things Pumpkin'!  My kind of link up.  I have already looked through the current posts and have a ton of new pumpkin recipes to try.  Thanks for hosting Steph's Bite by Bite and Part Time Housewife!

This is one of my favorite pumpkin recipe and a go to one during fall.  I got this recipe from my friend Angela who probably got it from somewhere else, so thanks to whoever did create this one!


Pumpkin Dip
Courtesy of Angela, courtesy of someone else (most likely)

6 ounces cream cheese, softened
1/2 cup brown sugar (I use just under 1/2 cup)
1/2 cup, plus 1 large spoonful pumpkin puree
2 teaspoons maple syrup
1/2 teaspoon cinnamon
Assorted dipping items (I like apples and graham crackers)

1. Mix cream cheese, brown sugar and pumpkin together with an electric mixer until well blended
2. Add in maple syrup and cinnamon and mix until blended and smooth
3. Chill for at least 30 minutes before serving
4.  Enjoy!  And try not to eat it all in 1 sitting (it'll be hard)

And that's it!  Couldn't be simpler.  And as someone who has made this many times - below are a couple of pointers that will help make this as delicious as possible:

- Make sure your cream cheese is really softened.  It makes all the difference in the consistency of the dip
- Use real maple syrup, not the kind that you buy in the grocery store that comes in a bottle shaped like a woman.  I'm just saying... that's not real maple syrup.  Splurge on some good stuff.  It's worth it.

What's your favorite pumpkin recipe?


Part Time House Wife

Thursday, October 11, 2012

Mini Monkey Bread

A couple of Friday's ago was my friend Melissa's birthday.  Her birthday fell on a Friday and since she had a long run on Saturday morning, she didn't really want to do anything Friday night (understandable!).  So instead, our friend Nadia organized a surprise brunch to be waiting for her when she came back.

There wasn't much noticed (I think we planned it in 2 days!), but Nadia put together a fabulous spread.  In addition to the typical breakfast foods (scrambled eggs, sausage patties, bacon, turkey bacon and latkes), Nadia made (from scratch!) brown butter cupcakes with a caramel icing - and bacon bits on top.  Amazing!
we put together a great spread, huh?
a-maz-ing
We also had 2 kinds of mimosa's and of course, coffee to wake everyone up.  It had been a long time since we'd all gotten together and it was a wonderful morning/afternoon of catching up.  Must do it again soon!

My contribution to the day was Mini Monkey Bread.  I love Monkey Bread - it's one of my favorite things to bring to brunches.  It's been a Christmas morning staple since the first time I made it at the first Pajama Christmas (yes, it's a thing in my family.  And no, it does not mean staying in our PJ's all day.  Maybe I'll explain sometime around Christmas).

It makes a ton though, so when it's not a large group, it's easy to overdo it on the Monkey Bread.  I knew there'd be a ton of other food at the birthday brunch so wanted to scale back the quantity.  I kinda just made these adjustments on my own!

The Mini Monkey Breads turned out delicious.  Everyone enjoyed them and I call them a success!  Plan on implementing this version at Christmas too.


Mini Monkey Bread

Monkey Bread Portion
3/4 cup granulated sugar
1 tbsp ground cinnamon
2 cans refrigerated buttermilk biscuits
1/4 cup melted butter, plus some extra (non-melted) butter

Frosting
4 oz cream cheese, softened
1/2 cup powdered sugar
1 to 2 tbsp milk

Bakeware
Muffin tin

1. Preheat oven to 350 degrees
2. Mix sugar and cinnamon together, set aside
3. Cut the biscuits into 4 pieces
4. Toss the cut biscuit pieces in the cinnamon sugar
5. Using the non-melted butter, coat the inside of the muffin cups with the butter (could also use Pam for this step, but butter is so much better!)
6. Drop tiny pieces of butter into the bottom of each muffin cup (no science here, just whatever amount looks right)
7.  Distribute the cinnamon sugar coated biscuit pieces in the muffin cups.  I used 6-7 pieces per cup
8.  Drizzle the melted butter over each cup (you probably won't use all of it)
9.  Sprinkle with remaining cinnamon sugar (there will be some leftover, but I can't figure out how to cut down the mixture)
10. Bake for 10 minutes or until golden brown.

While baking, make cream cheese frosting -
1.  Beat cream cheese and powdered sugar with an electric mixer until well blended
2.  Slowly mix in milk until frosting is at desired consistency
Once the monkey bread is ready, flip onto serving tray and top with desired amount of frosting!

Below are some additional photo's to make you drool.

Enjoy!
Ready to go into the over - look at the melted butter and cinnamon sugar goodness
Right out of the oven
When flipped out of pan with buttery deliciousness
Frosting waiting to be applied

Wednesday, May 16, 2012

Strawberry Balsamic Chicken

A couple of weeks ago, strawberries were on sale at my grocery store.  And they looked delicious.  So of course I bought some.  Probably some too many.  And while I love eating strawberries sliced and plain, I thought it would be fun to do something different.

My idea was Strawberry Balsamic Chicken.  Steam cooked chicken breast with a balsamic strawberry glaze to be served with some almond rice.  Well...my first try was a disaster!

I had no idea how much balsamic vinegar I would need to make a glaze and made way to much.  In addition, I wasn't sure how/when to add the sliced strawberries in and did it way to early and they absorbed all the balsamic and looked like little pieces of black death.

The over abundance of sauce drowned my poor little piece of chicken and was way to vinegar-y for me and the strawberries completely tasted like the balsamic. No strawberry flavor at all.  I ended up scraping a lot of it off to eat it.

Not to be deterred, I tried again a couple of nights later.  This time, I used significantly less balsamic vinegar for the glaze and cut it with a splash of lemon juice.  I threw the sliced strawberries on top right as I was serving.  This time it worked!  I thought the lemon juice cut some of the acidic taste of the vinegar down and since the strawberries weren't cooked in the vinegar, they tasted like strawberries!

This just goes to show you, if at first you don't succeed - try again!


Thursday, May 10, 2012

Chickpea "Kitchen Sink" Salad

A couple of weeks ago, for lunch, I grabbed a chickpea salad from the cafeteria in my building.  It was delicious and inspired me to re-create it.  It was full of veggies and had a delicious vinegar-y dressing on it.  The dressing reminded me of a dressing from a pasta salad I had made before from my Betty Crocker cookbook.

Utilizing the dressing recipe and my imagination, I came up with what I am calling my chickpea "kitchen sink" salad!  I have since made this recipe a couple more times and every time I use different veggies. The dressing goes with all of them!  So feel free to use whatever vegetables you have on hand or are in season.


Chickpea "Kitchen Sink" Salad
Dressing adapted from Betty Crocker's Cooking Basics cookbook

Garlic Vinaigrette Dressing (see below)
2 cans of 16 oz chickpea (low sodium), drained and rinsed
1 tomato, diced
1 cucumber or green zucchini, diced
1/2 red onion, diced
1 green bell pepper, chunked
1 red bell pepper, chunked

Garlic Vinaigrette Dressing
2 cloves garlic
1/4 cup white vinegar
2 tablespoons water
2 tablespoons olive oil
1/2 teaspoon salt
1/2 teaspoon vegetable oil

1.  Combine all vinaigrette ingredients together and mix well
2.  Combine chickpeas and all vegetables together in a large bowl
3.  Toss chickpea/vegetables with garlic vinaigrette
4.  Cover and refrigerate for at least 30 minutes (the longer the better!)

Enjoy!

PS - I'm off to visit friends and family later today, so not sure if I'll be able to post until Monday.  Enjoy your weekends if I don't post.

Sunday, April 15, 2012

Citrus Pork Tenderloin

I made a delicious pork tenderloin this weekend.  I typically don't make pork.  Not sure why, we definitely ate pork when I was growing up (usually chops) but I can't even remember the last time I made it at home.

I used a recipe I found on Pinterest, but made some changes (love Pinterest!).  One of the things I loved about this recipe was the handful of ingredients: salsa, cut pineapple, pork tenderloin, olive oil and lime.  Gotta love 5 ingredients.

First combine the salsa and pineapple.

Next rub olive on the pork tenderloin and top with the pineapple-salsa mixture.

Pop in the oven for 40 mins at 425.  Let stand for 10 minutes before slicing.

Squirt lime over top before serving.  I served mine along side some Near East Sun Dried Tomato rice.  So easy and delicious!

Citrus Pork Tenderloin (adapted from allrecipes.com)


1 cup salsa
1 20 oz can of cut pineapple
2 pork tenderloins (about 1 lb each)
olive oil
1 lime


1.  Heat the oven to 425 degrees F. Stir the salsa pineapples in a small bowl.
2.  Place the pork into a shallow baking pan. Rub the pork with the oil. Pour the salsa mixture over the pork.
3.  Bake for 40 minutes or until the pork is cooked through. Remove the pork from the pan and let it stand for 10 minutes. Squirt with lime and enjoy!

Tuesday, February 21, 2012

Hawaiian Shredded Chicken and Lime Rice

So, as stated in my last post, I love Pinterest.  It's such a great place to find ideas and get inspired.  Mostly, I pin clothing I can't afford and lots of delicious looking recipes.

Any who... I also love my crock pot.  Such a useful cooking appliance and one that doesn't have to be super expensive either.  My crock pot was one of the first appliances I bought myself once I was living in the city (and in a tiny studio so space was a premium, but I had to have my crock pot!)  There are a lot of crock pots out there and you could spend a lot of money on it, but I got a pretty basic one (just a high and low switch, no timers or anything - I was on a budget!).  I've had it for about 6 years now and have never had any problems with it.

I also love using the crock pot because I like cooking on Sundays and having left overs all week.  Most crock pot meals make a ton of food - great for leftovers and reheating!

So this weekend, I used my crock pot to make a delicious and easy meal.  I chose a recipe from Pinterest called Hawaiian BBQ Chicken.  The full recipe can be found here: Hawaiian BBQ Chicken.  Just 3 simple ingredients - how can you not like that!  I paired it with a lime rice (a version of the recipe on this site, how I changed it below).

Success!  Hawaiian BBQ Chicken with Lime Rice

I thought both recipes were delicious.  For the Hawaiian BBQ Chicken, I did think it needed a little bit more sauce, but that's very much a personal opinion as I love sauces in general.  Luckily, I had another bottle of BBQ sauce already, so I just added a little more to the top.  With the rice, I did make some changes to the recipe I used.  I left the cilantro out because I am not a fan of cilantro.  I always buy it when called for in recipes, but I either end up leaving it out or picking around it, so this time I didn't even buy it.  I also used more lime juice then she recommended.  Just minor changes, but based on my personal preferences.  That is one of the things I love about cooking - you can adjust to your own tastes.

Overall, I was pleased with how both dishes turned out and I did end up with tons of left overs for my lunches this week.  While normally rice does not reheat well, I find when it's covered with something (i.e. saucy shredded chicken) it stays pretty moist.

More to come,
S